Friday, August 29, 2014

Stamp Block Backgrounds


In my last post, I talked about backgrounds to help ground an image or to add color. One of the simplest ways to do this is to use your clear stamp blocks! You want a block that is just slightly smaller than the image you want to use, so that the image overhangs just a bit. This adds interest and importance to the image. Be sure your block is clean - alcohol will take care of fingerprints, but if you've gotten some adhesive on it (it happens, who knows how?!) try lighter fluid for easy removal.

Tap the clean block several times on your ink pad (in this case, Pistachio Pudding). The texture will look like tiny dots, due to the fact that the ink beads up on the acrylic. Stamp down on your paper as you would normally. Ta da! Nice clean edges and a block of color. If your block is large, you may need to put a silicone pad or something a little "squishy" beneath your paper before you stamp to prevent "whiteout" spots, although you may decide (as I did in the sample) that you like a point of light in your background. Clean as usual on the Stampin' Scrub.


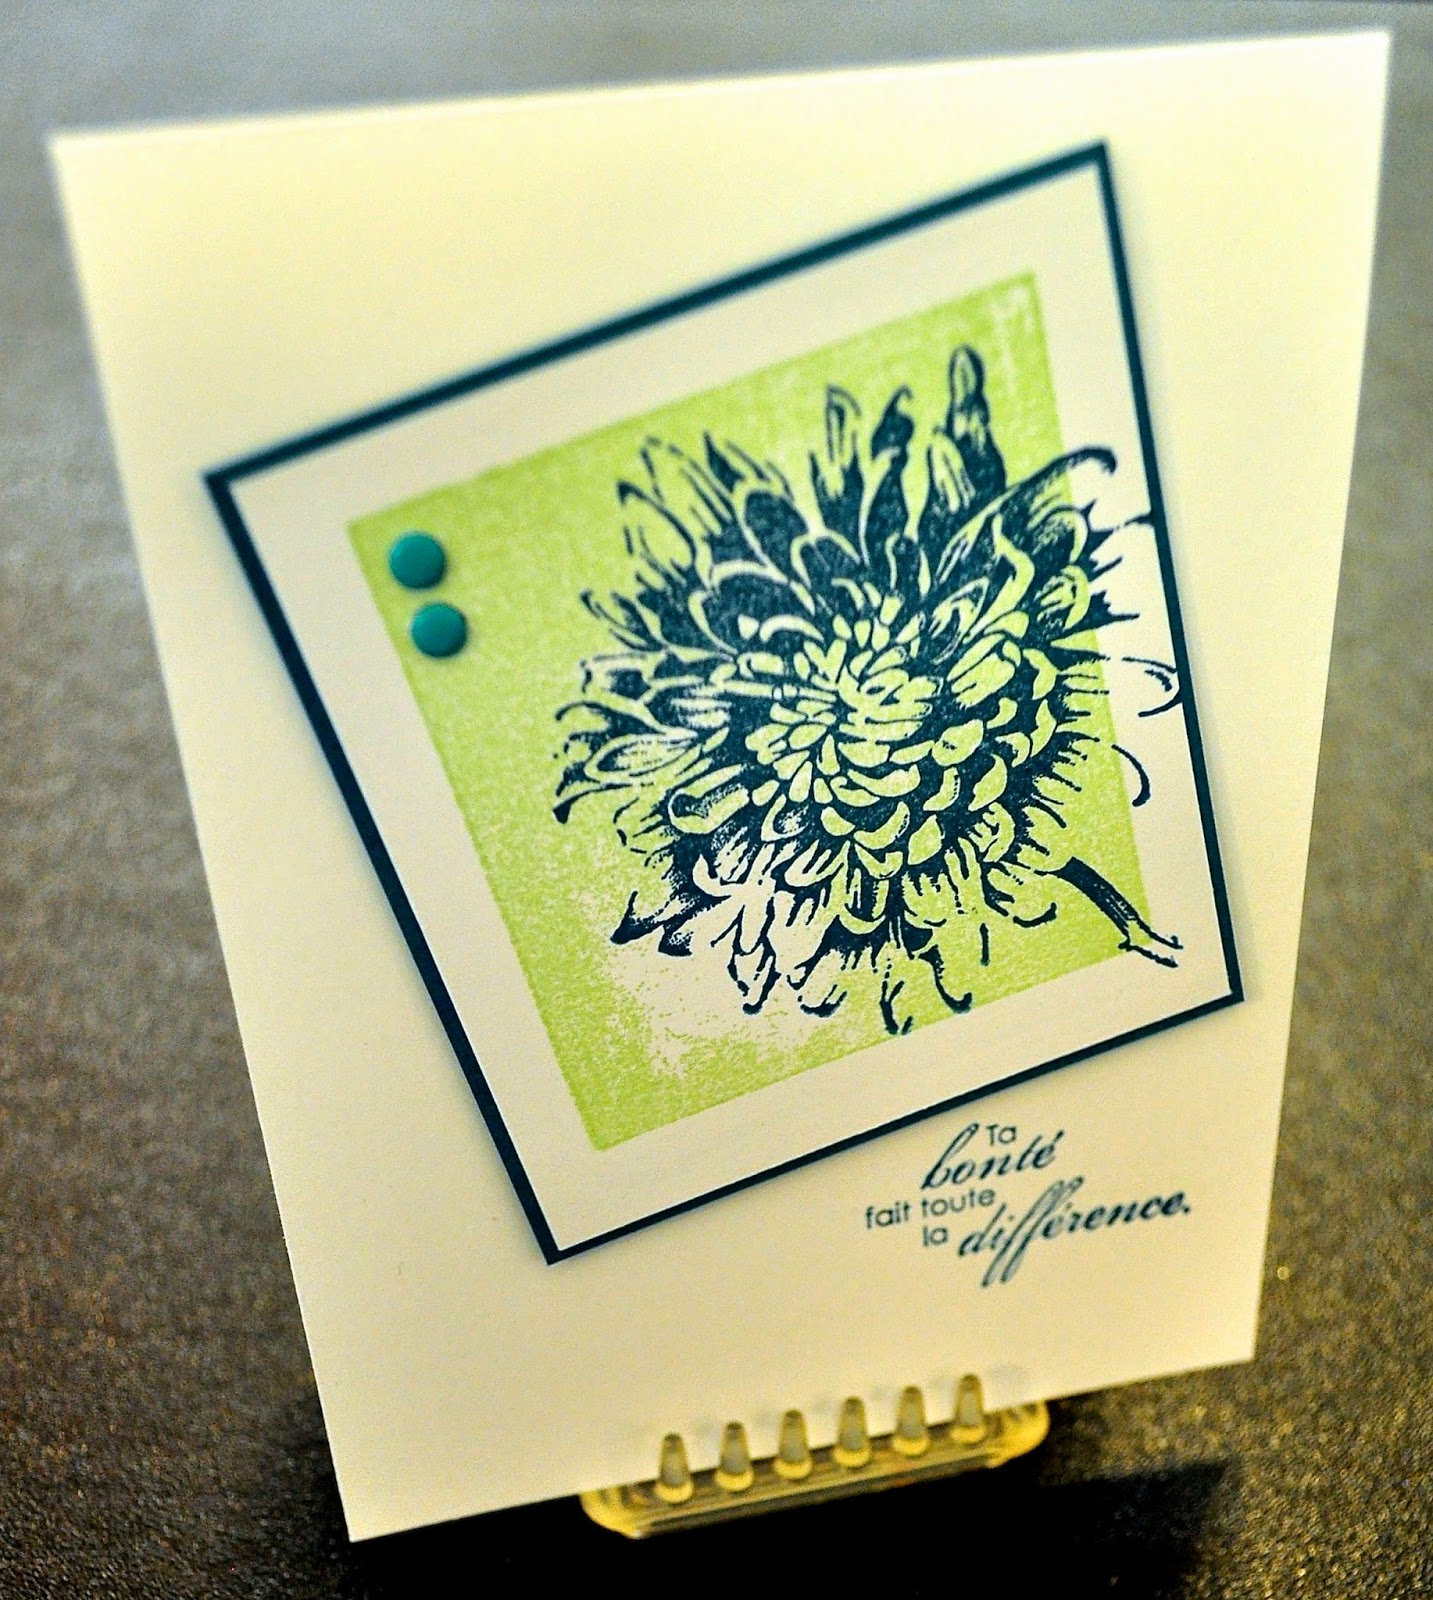
Blooming with Kindness has loads of useful sentiments (in French or English!) and a very graphic flower, which translates well for this technique. Ink up the flower in Island Indigo, and angle it so that it overhangs your color block in a couple of places. Back with a very narrow margin of Island Indigo cardstock and add a couple of coordinating Candy Dots.


Inside, you'll see that I've reversed colors and used the flower in Pistachio Pudding for some background interest. I inked once, and stamped three times. The fainter the image becomes, the more your eye reads it as texture, rather than as image. I've repeated the sentiment from the front of the card in its English translation on the inside of card the front, and completed the thought with an additional sentiment in English. I'm a strong believer that we need to learn and appreciate other languages and cultures in this interconnected world.

Kathy


Wednesday, August 27, 2014

Work of Art meets Everything Eleanor


Have you ever tried to make something look effortless?! It's not as easy as it sounds, and that's exactly why Work of Art has become an instant favorite of mine. Watercoloring is such a wonderful look, but I've never been a watercolorist. Until now.

With this stamp set, you can make a background that anchors or adds color to just about anything else you want to put on the page. And what a great message to send those we love or wish to encourage: You are a fabulous work of art.

To replicate this card, you'll need Bermuda Bay, Hello Honey, and StazOn black inks (Hint: The small watercolor stamp is inked only once but stamped three times, from bottom to top). The swirl is from Everything Eleanor. A scrap of Bermuda Bay CS and the Elegant Butterfly punch add the third dimension, with a row of Basic Rhinestones for the body. Corners were rounded with the Project Life Corner Punch (p. 188). Pop up your "art piece" with dimensionals, and you're done! Another superspeedy layout for a card that fits so many occasions.

Kathy

Note: We made this in a demonstrator group meeting, but I believe the original concept came from SU! demo Sandi MacIver.


Monday, August 25, 2014

Silver Shimmer


Today's post is for all you "bling" lovers out there. Dawn Olchefske was inspired by a piece of jewelry to create this elegant card with the Petite Petals, Pansy, and Itty Bitty Accents punches. Of course, the gorgeous Million & One sentiment set (stamped here in Basic Gray) is a perfect match to the Silver Glimmer, Silver Foil and Whisper White papers.


The only other thing you need for this card is a whole bunch of Stampin Dimensionals and some Basic Pearls and Rhinestones.

Isn't "Clean & Simple" wonderful?!

Kathy


Friday, August 22, 2014

Bleached Summer Silhouettes


I think I've pinned about a hundred samples made with Summer Silhouettes. This is a good indication that a set is versatile, easy to use, and... I need it! At any rate, I believe that the inspiration for this particular card was first noted on the blog of SU! Demo Lisa Young.

For this card, I've used Soft Suede ink and paper, as well as Pool Party paper. Petite Pairs provides the sentiment. The half flower on the banner is hand cut, popped up on dimensionals, and accented with the tiniest pearl.


I kept the inside very simple.


How do you stamp with bleach? Easy-peasy:

1. Make a "stamp pad" by folding a paper towel into quarters. Place it on a disposable plastic plate. Pour on enough bleach (some people recommend the thicker "splashless" variety but I don't think there's that much difference) until the paper towel sounds "squishy" but no bleach runs when you tip the plate. Note: Best results are obtained when using fresh bleach. I also recommend taking the time to change into old clothes!

2. Press your stamp into the bleach pad several times until it seems to be evenly coated, then stamp onto colored card stock. You'll need to wait several moments to see the magic happen! It's a good idea to make test samples on several different colors, as the specific composition of the dye used on the card stock may not be what you expect! Rust and Olive bleach to yellow, Navy to light blue, etc. BUT you also need to be aware that different dye lots of the same color may perform differently!

It makes sense to do several bleached projects at once while you're being all messy and experimental. When you are done bleaching, IMMEDIATELY clear your bleach-soaked pad off your work area to avoid heartbreak. Don't ask.

3. Bleached card stock must be completely dry before you add ink (if it isn't, your ink will just bleach out). So now is the time to safeguard your rubber. Wash stamps with a mild soap such as Ivory dishwashing liquid to neutralize the bleaching action, and pat dry or leave to air dry. Before you put them away or use them again, spritz on a light coat of Stampin' Mist and allow to sit for a moment, then brush across Stampin' Scrub to remove excess. This will prevent your rubber from hardening.

4. Once bleached card stock is dry, overstamp with coordinating images. This juxtaposition of detail in the stamped images and the soft look of the bleached images will give you a foreground/back-ground effect that creates a subtle dimensional effect on your card.

Watch for more samples made with the Summer Silhouettes stamp set, as I put together my own "Set Sampler" from my Pinterest pin collection (to see them all together, go to the labels column on the right and click on "Set Sampler - Summer Silhouettes).

Kathy


Wednesday, August 20, 2014

Just Sayin': Love ya!


I swapped with Monique for this card recently. What a fabulous way to use a sentiment set as the "art" on a card! And keeping it simple in black and white with a pop of red glimmer paper draws your eye right where you want it. We've got white StazOn, or you could emboss in white on black. The wee heart comes from the Owl Builder punch.

Kathy