Showing posts with label Recycled. Show all posts

Monday, September 16, 2013

Stamp Club Olathe: September 2013


Re-Purposed Menu Binders

One of my customers likes to bring me things just to see if I can recycle them into something new. (Stay tuned, Lorena, there's another of your inspirations coming in the Christmas collection!) Her daughter was working at a restaurant when the company decided to update the menus, so I was issued the challenge: What could we make of these little 3-ring binders?


As you can see, there are a variety of page sizes, some tabs, plus inside and outside covers to consider. Since it's autumn and the tones of the menu are the colors of rich spices, I chose a palette of Very Vanilla, So Saffron, Cajun Craze, Old Olive, and Early Espresso. For the cover, I wanted to try out the watercolor technique using clear blocks shown here. We used the World Map stamp and glued the panel to the cover with the amazing Tombow Multipurpose Liquid Glue, smoothing from center to edges with the edge of a bone folder. Each person's cover came out beautifully different, but here's what mine looked like:


By selecting a color palette that echoed that of the original, I didn't feel that I had to wrap my new cover around edges and corners. Just covering the images seems to be enough.


Here's the inside front cover (the inside back will be similar, but likely with a pocket adhered at the bottom). I stamped this in Rose Red as an experiment... but by the next page I had changed to Cajun Craze, which tones much better with the original colors peeping out at the margins! Creative Elements comes together so nicely over an "anchor" of Old Olive stamped with a clear block. I chose a sentiment from Feel Goods, thinking it would be a great reminder no matter how one chose to use the book.
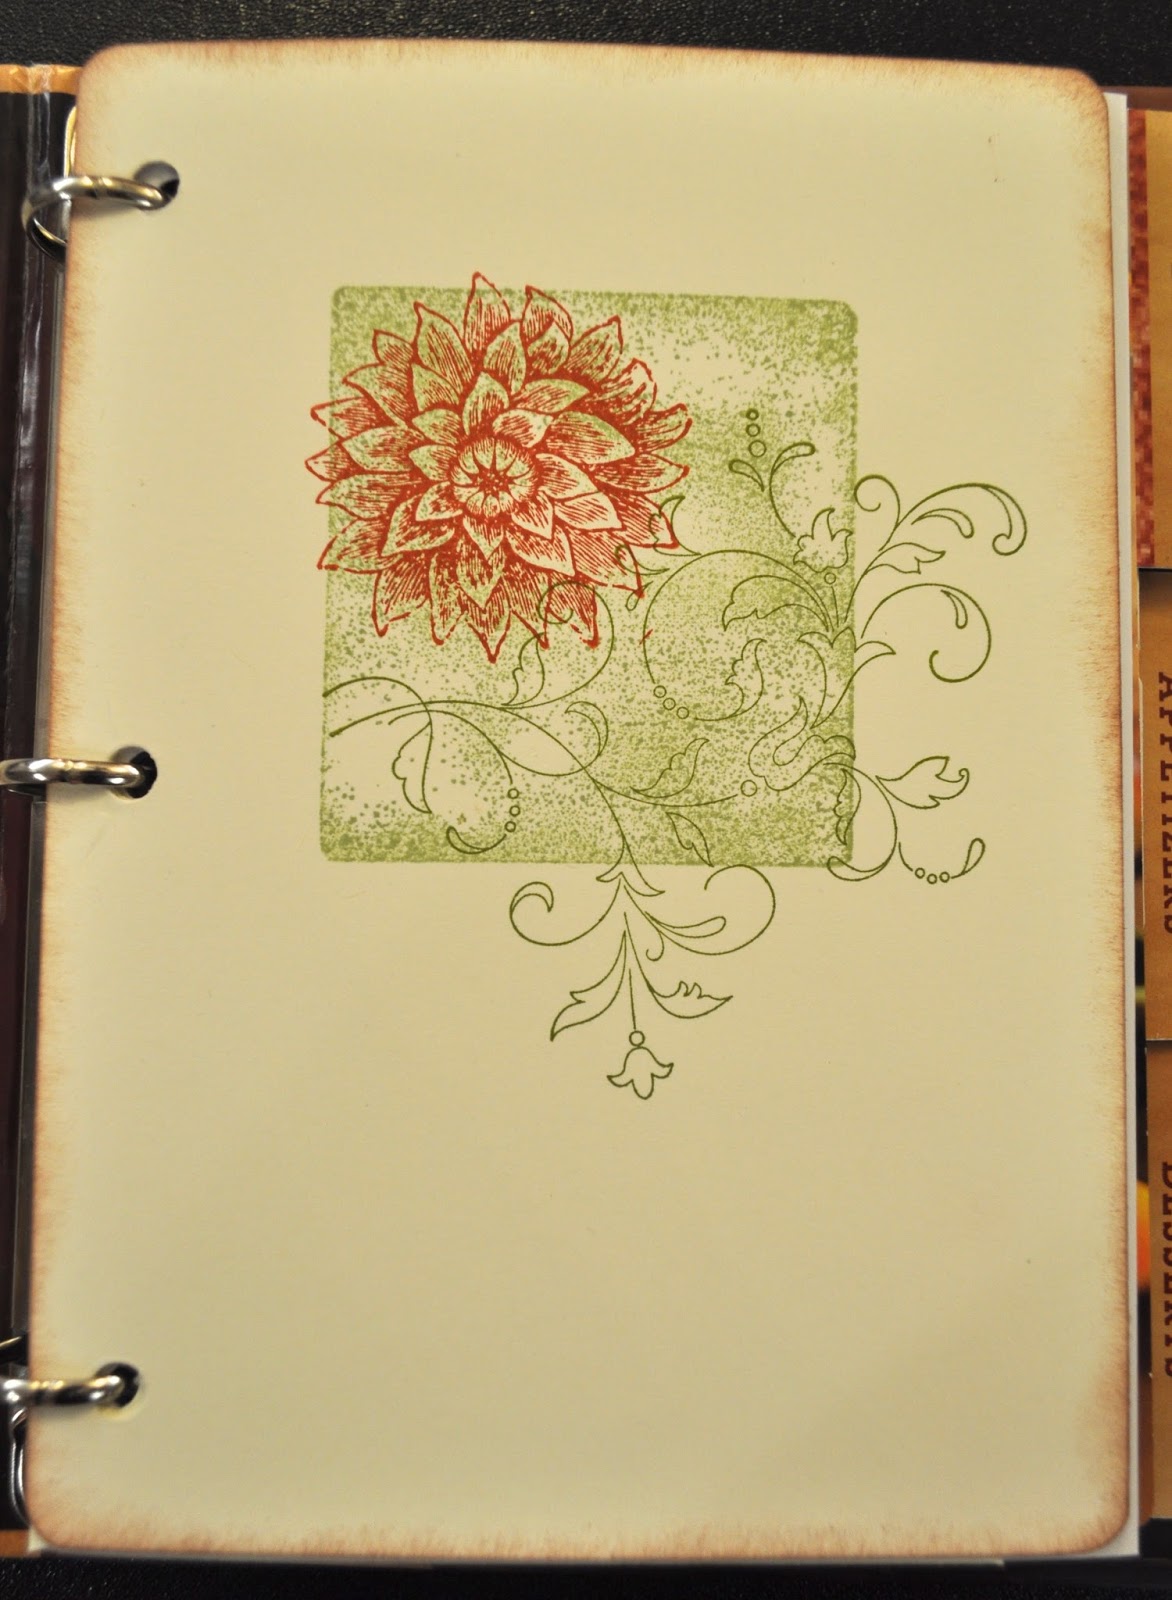

Divider pages are done simply, as above, with three quick stamps requiring no careful placement.


Pockets are easily added by simply punching holes in an envelope and inserting as needed.

Now, what could this project be used for?? Our list of ideas included...
     *heritage recipes
     *babysitter or housesitter notes
     *holiday planning (including names/addresses for mailing cards, shopping lists, and recipes)
     *a gratitude journal
     *advices pages from each attendee at a bridal or baby shower
     *collected wise words to live by/favorite sayings
     *art or idea journal
     *home dec records (paint chips, fabric swatches, etc. for each room in the house)
     *photo/prayer journal for each family member as a gift for an elderly friend/relative, especially someone in the early stages of Alzheimers

Hope this inspires you to repurpose something you might otherwise send to the landfill. It's a great way to keep that brain in "innovation gear"!  -Kathy

Friday, September 6, 2013

Stamp Club Lawrence: August 2013


There are these so-cute muslin bags in the SU! Holiday Mini catalog this year (and incidentally, they're very well made). I was delighted when my August stamp club hostess asked to do a project that entailed stamping on fabric! Since SU! no longer stocks craft ink, I needed to re-visit this technique. I made sure there were no wrinkles in the bag, then cut a piece of chipboard to slide inside in order to make sure no ink or paint transferred through to the back side. 

As you can see, the Summer Starfruit (one of the new "firm foam pads" introduced last year) worked very well. Those pads hold a LOT of ink!


I liked the way that the Gumball Green enabled me to do an overlapping effect. One of the things I love best about summer is gazing up through the canopy of green leaves and marveling at the subtle differences where they overlap, or dance gently in the breeze, or sparkle in the sunlight. But I wanted the Cherry Cobbler to "pop"! It worked fine on the small florets, but on the larger flowers it was too transparent to have the effect I was looking for, so I decided to try a recipe I had seen for acrylic paint and fabric medium. I messed with the color until I had a pretty good match, then added 1/3 fabric medium to 2/3 paint. It's quick and easy to put a thin coat of the paint onto your stamp with a sponge dauber. Just be sure to wash it off promptly before it dries in the little crevices! You can see the difference on the two larger flowers to the right of the design.


For the tag, I used the Chalk Talk set with coordinating framelit. I wanted to make the tag a bit more substantial and incorporate a natural element, so I used the cork band from a disposable hot cup that someone had conveniently left behind to make a backing. Did you know that you can cut more than 50 materials with your Big Shot?! The amazing Tombo Multi-Purpose glue worked just great to adhere these together.


Finally, I discovered that if I tied the bow right onto the cord of the bag, I could slide it up and down as I cinched the bag closed. How about that?! The tag comes with a nifty little c-shaped opening that's perfect for hanging behind a bow.

What would YOU put in this little bag if you were gifting someone with it?

Kathy

Monday, April 16, 2012

A Place for Everything


We live in an older home with zipp-o storage. The area which was designated for the washer & dryer before we bought it, was - not long before that - a back porch. We managed to make a place for hanging clothes, and to install a couple of shelves above the appliances. Here lives not only laundry soap, stain removers, and bleach, but light bulbs, cat food & paraphernalia, dead flashlights, picnic & beach stuff, coolers, hiking gear... oh yes, and garden dreams (mostly in the form of seed packets) and canning supplies. Talk about a clutter nightmare!

As I was thinking about how to tame this beast, I decided what was needed was some visual consistency (restful to the eyes), a functional way to combine "like items", and easy access. My solution was to acquire a number of large plastic gelato tubs (at the time my daughter worked as a barrista in a coffee shop - convenient!) which I spray painted yellow, then I just laid some assorted leaves on them and shot on some green and rust spray paint, allowing the leaves to act as stencils.
The smaller items went into the tubs, and this has successfully worked for some years now - except for now and then forgetting what category was in which tub.

When the framelits labels dies arrived in the studio, I knew the final piece of the puzzle was about to fall into place. I typed my categories into Word and ran them onto very vanilla CS, then ran these through my Big Shot with the framelits and added color with stamps and some vintage buttons (actually, I can still picture the buttons in a row down the front on my grandmother's bath robe).


There you have it. Although in April we have Earth Day to remind us to think twice before we label something trash, my family has always believed in Reduce, Reuse, Recycle as a praiseworthy way to utilize our God-given creativity. Hope this will spur you to think how you might re-purpose some "trash" into useful service.
-Kathy

Sunday, February 19, 2012

Sale-a-bration Sundays: Hat Box


This is my very favorite of the Sale-a-bration projects I've made this year (thank you, Patty Bennett, for the inspiration) so I'm showing it off to you on my birthday! I just grin each time I catch sight of it. Did you note the hat pin? Right where it ought to be, on a hat!

The crown of this little beauty is one of the containers that our brads and buttons come in (if you don't have any empties, you can get them for about 65 cents each on p. 226 of the Idea Book & Catalog). What a perfect place to stash some candies, or to nestle a necklace or some earrings on a bed of cotton as a birthday or Mother's Day gift.

What's that you say? Oh. Yes, OF COURSE we will be making this one in class! Don't miss it. -Kathy

Wednesday, October 12, 2011

Holiday Open House Drawing Winner!!


Congratulations to Lara B., our winner in the drawing at the October 1st Idyllwilde Studios Holiday Open House! We hope she enjoys her stamps and rub-ons.

We also want to thank each one of you for stopping by - we had a great time, and hope you did too. Those of you who ordered holiday designer series paper at the event will find an instruction sheet with pattern for the snowman soup bottles pictured above, including the recently-perfected hot chocolate recipe I used in the recycled frapuccino bottles. Isn't the Frostwood Lodge DSP just perfect for the little vests?! And the Northern Frost strip die makes cutting snowflakes a breeze!

(Tip: I prefer "off brand" frap such as Aldi's because the label is shrink-wrapped onto the bottle, leaving no sticky residue behind. Not to mention the cost savings! However, if you're a Starbucks devotee, you can remove the sticky residue after peeling the label by using lighter fluid and a paper towel.)

Have fun with your own holiday plans... now is the perfect time to start! -Kathy

Wednesday, July 20, 2011

Corraling the Small Stuff


When Ginny turned twelve, she began to sort through the accumulation of childhood and toss. Beads, barrettes, buttons, feathers, "jewels", shells, bits of ribbon and string, little flowers and lots of miniature items once deemed suitable for beanie baby tea parties. Both the sentimentalist and the recycler in me were horrified (and somewhat envious of her ability to simply let go). Much of it did make it into the trash, but I intercepted a number of things and then of course I had to answer the question, "Now what?!"

Any storage system is only as good as your ability to retrieve an item when you need it! I followed four guidelines:
1. I would use storage containers I already had.
2. With so many tiny things, I needed to be able to see them.
3. I decided to sort by color as the most likely way to find what I would need in future.
4. I must be able to easily add new items to the collection so that I could remain organized!

These canning jars have worked beautifully for me, pints in the front row, quarts in the back. In the end I eliminated the lids I had originally envisioned using, to remove one more step to getting at/putting away the collection. I can easily see if I'm running low on a color or need to stop collecting a particular color for awhile.

Hope this sparks an idea for conquering some of your storage/retrieval challenges. -Kathy

Monday, July 18, 2011

It's a Wrap!


My youngest daughter just had a birthday, and my oldest created this gift presentation for her. I thought you deserved to see it!

The base is the carrier carton for a particular beverage (cool brand graphics remain visible on the other side). It's hand embellished with Sharpie, then four vinyl records have been adhered. These are decorated with SU! rub-ons. A couple of key tags concealing the hole in the center 45s mask a ring dangling there. Chocolate bars are adhered to the outer two discs, and jars of various items (two also featuring rub-on decor) are strategically placed. I love the way you can get just a little idea of what the gifts might be but full disclosure requires further investigation... There is also a fabric-covered bundle enhanced with a feathered hair clip and a couple of chicken feathers donated by this years' young hens (so okay, my daughter prefers non-traditional pets. Raise your hand if you're surprised?!).

The entire thing became the center piece for the dinner table, and it was such a fun and interactive way to present an assortment of little items while recycling. Maybe I'll get something like it in a couple of months?! -Kathy

Wednesday, March 23, 2011

Ribbon Cupcake Box


Isn't this just adorable?! They make me want to stick out my finger and take a swipe. I saw them on Sandy MacIver's blog (where you can find a link with printable instructions) and had to make my own version, using a juice lid instead of a paper lid (the holes punch easily with your crop-a-dile or paper piercer, hammer and mat pack). I also doubled the cupcake liner for sturdiness.

I am imagining these for table decorations or favors at a baby/bridal shower, filled with candies, girlie hair stuff, safety pins, potpourri... whatever seemed appropriate to the recipient.
They're surprisingly quick to make, especially if you get set up in an assembly line fashion with several sets of hands busy.

Calorie-free cupcakes, how about that! -Kathy


All supplies Stampin' Up!

Paper:
card stock to match your ribbon
Accessories:
Big Shot and Perfect Setting die; Elegant Lines embossing folder; 1 1/4" striped grosgrain ribbon; coordinating 5/8" satin ribbon; scrap of 3/8" taffeta ribbon; linen thread; coordinating Big Designer Button; needle and thread; clean metal juice concentrate lid; cupcake liners

Friday, March 18, 2011

Lawrence Stamp Club - March 2011


We made these little chests using the "Faux Metal" technique I taught at stamp club this month. Aren't they darling?! My original idea was that they would be a sort of "story chest". I read this in a book - a grandmother put a selection of small items in a chest and whenever her grandkids visited her, they would be allowed to select one item from the collection and she would use it as the springboard for a story, either imaginary or about her life/childhood. We did a little brainstorming, and they'd also be perfect for office miscellania (paper clips, tacks, push pins, erasers, stamps), presentation of Hershey nuggets, jewelry, buttons, baby hair thingies, spices, garden seeds... you take it from here.

Oh, notice how all the drawer pulls on the 2nd sample are different (way to go, Jsca!)? I'll be showing you an organizational tip in a day or two that makes it easy to retrieve such a variety of objects.

The drawers are made from the matchbox die, and for chipboard I've attached my "faux metal" card stock to cereal box cardboard using that amazing Tombow multi-purpose adhesive. -Kathy

Monday, October 4, 2010

Haunting the Studio


The seasons are changing, and that's a great excuse for collecting favorite things together and creating a seasonal grouping! The fun thing about it is, you don't have to go out and buy it all - just look around your house for things in the colors you want to emphasize, or things that fit the theme. In these photos, you'll see a paint can and discarded t-shirt recycled into a mummy treat container; boots and socks suggesting traditional characters of the upcoming holiday (I just realized, I should have added my little hearth broom!); some vintage file boxes from the days when my dad had a store downtown; shutters found on the curb, to which hinges were added so that I'd have a room divider/background screen; and of course, cards and treat container ideas for my stamping friends. So many of these things can be reconfigured for Thanksgiving (plate, candle, stones, file boxes, wire pumpkin, shutters) - I love it when I can feel ahead of the game for even a moment! And when you rearrange your things, create a little vignette like this as a focal point, it makes the familiar feel fresh and new and gives a shot of energy to you and your home. Go and play! -Kathy

Friday, May 21, 2010

Punching Fancy Flowers


What else (I hear you asking) can you do with the fancy flower punch being offered in the Spring/Summer Mini Catalog?! Here are a couple of ways to make a 3D flower that will really dress up a project!

If you want to use designer paper, punch six flowers from the paper of your choice with the Fancy Flower punch (here I've used Ruby Red from the Patterns Pack available to hostesses). Sponge the edges of the petals if desired to give them definition and "shabby chic". Spritz lightly with water (this helps prevent the paper from tearing) and wad up into little pea-sized balls. Carefully open up each little ball (this is the stage where tearing is most likely to occur), but don't try to get the wrinkles out. Next, punch a "center" using the Boho Blossoms punch. You'll also need a 5/8" brad. Lay out your paper piercing tool and foam mat. Stack the punched flowers on top of each other, off-setting the peaks and valleys of the petals with each layer. End with the Boho Blossom punch on top. Pierce through the center of the stack, working the piercing tool around a bit to enlarge the hole (this helps prevent the prongs of the brad from bending as you're trying to insert it). Open the prongs on the back to hold the layers in position. Starting from the top, pinch the first layer up and around the brad, curling the petal edges under for volume and a natural look. Move on to the second layer, and so forth until you've worked your way to the bottom. You may attach the flower to your project using the prongs of the brad or a pop-up glue dot.

You can also make these flowers from magazines or catalogs you're ready to recycle. You'll need 12 layers for this approach, since the paper is thinner. No need to spritz these, just wad and open. Assemble as above, except this time I omitted the smaller punch in the center and used a corduroy button brad. To finish, I shot a little Log Cabin Smooch Spritz onto the flower and the button. This worked great to tone down the red so that it looked old like the magazine colors.

You'll be surprised at how quickly these come together after you've done a couple! Kathy

Wednesday, May 5, 2010

May 2010 Stamp Club


Our hostess this month wanted to make decorated storage jars. I decided to broaden the focus just a bit, so I put out a selection of containers with "potential" and had each person choose one to decorate. We did a little brainstorming and came up with a list of possible uses for each. Then we fanned out, selecting paper, ribbon, embellishments and stamps that would support our ideas. The photos above show you some of the great results! (Too bad I didn't think to bring in the camera for the first session...)

Incorporating dimension is always a challenge, and it's especially important on projects that are 3D by nature. I demonstrated the flower you see on the two round brie boxes, made with the fancy flower punch and old magazines/catalogs. Our 5/8" brads or pronged corduroy buttons are perfect for holding them together and providing a center! We used the new Log Cabin Smooch Spritz to antique them a bit.
Watch for an upcoming post that features just the flowers. Kathy

Tuesday, March 30, 2010

March 2010 Stamp Club


For those of you who weren't able to join us for stamp club this month, here's one of the projects we did using a stencil cut with the big shot and felt pads to create a background, and recycled chipboard in lieu of a more expensive brand name product to add dimension. We also discussed how one might modify the stamped image to get more or less pirate effect, depending on the recipient/occasion.

I'll be adding the other project soon, so check back.

Kathy

Thursday, February 11, 2010

Heart & Home


Looking for a simple way to change up your decor? Fellow demonstrator Arla Ogle put together this super-quick project at a recent stamp day for local demonstrators. She had a number of empty frames acquired from cleaning out the home of an elderly relative. We trimmed some "Welcome Neighbor" designer series paper (a free Sale-a-bration item) to fit inside the frame opening, then cut letters from a new color of sheet vinyl with the Big Shot (which we placed on the outside of the glass). Peel and stick. What could be simpler than that?!

Thanks, Arla, for a great idea.

Kathy

Wednesday, October 28, 2009

Enjoy Every Bite/Halloween Treat Card


One last Halloween post for the year! (From me, at any rate.) Using the Sweet Centers Halloween stamp and Celery classic ink, I made a touchdown on Naturals White. I trimmed it down with the scoring blade to grunge it up a bit. Punch the center out with the 1 3/4" circle and paste that on the inside of the card for the message. Attach a strip of celery card stock with two brads. Fill your treat cup, slip it through the punched square, peel off the waxed paper strip and stick it to the card base by holding both above your head to center (or you can trace the placement with a pencil before adhering if that's easier, since the rim will be covered when you're done). Remove the stamped panel, place adhesive on the back, and glue in place. Done!


All supplies Stampin' Up!

Stamps: Sweet Centers
Ink: Certainly Celery classic
Paper: Elegant Eggplant, Certainly Celery, Naturals White
Accessories: 1 3/4" circle punch, Sweet Treat cups, two brads, 1/16" handheld circle punch


Here's a little quickie treat. I had a box of fancy paper clips from the local discount city. I removed the paper liner/label from the packaging and trimmed off the tab used to hang it. This left me with a nice little clear box, which I filled with Reese's Creams (Have you tried these yet?! Wow!). Then I cut a strip of DSP to wrap around the box, and made a label for the front by layering my white stamped image onto blue and black card stock. Before I glued it down, I took a "bite" out of the corner of the stamped panel with my circle scallop punch!


Enjoy all the treats that October brings to you, Kathy


All Materials Stampin' Up!

Stamps: Twick or Tweet
Ink: Basic Black classic
Paper: Day & Night DSP, card stock scraps in whisper white, brilliant blue and black
Accessories: scallop circle punch, 1/4" black grosgrain ribbon

Monday, October 5, 2009

Tiny Treat Jar


One of the things that I love to do is re-purpose or restore what might otherwise be headed for the landfill, so on occasion I'll be showing you projects that use "trash". I've had this half-size baby food jar in my stash of containers-with-a-future for some time, and decided it would make a perfect little offering of candy for a nephew. I put sticky strip around the edge of the lid to hold the ribbon in place. A leftover circle from the 3D Circle Ornament fit the lid, and I added a scallop punch and part of a goofy little stamped pumpkin guy (for my goofy little nephew). The front is a double layer of ovals with the sentiment "you make me smile" - and it couldn't be more true! Love ya, Liam. Aunt Kathy

Stamps: Twick or Tweet (Holiday Mini)
Ink:
Basic Black classic
Paper:
Basic Black CS, Dusty Durango CS, Rich Razzleberry CS, Almost Apricot CS Accessories: 1 1/4" Circle Punch, 1 3/8" Circle Punch, Small Oval Punch,, Large Oval Punch, Designer Label Punch, Dusty Durango 1/2" grosgrain ribbon, sticky strip, Tombow Multi Purpose Adhesive
Misc: Reeses Pieces